Gap Filling with PU Foam
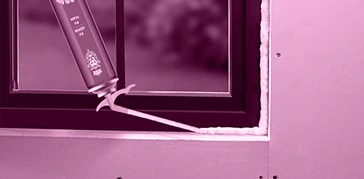
PU foam is one of the most practical and effective materials for gap filling and insulation in the construction industry. Its use in door and window frames, wall cavities, cracks, and plumbing penetrations provides long-term advantages in terms of both installation and insulation. Application with the correct techniques and surface preparation prevents air leakage and saves energy.
Why is Fill-in-the-Blanks Important?
Voids in buildings not only create aesthetic problems, but also lead to heat loss, sound transmission, and moisture problems. Therefore, these voids need to be filled effectively.
- Prevents heat loss: Gaps around doors and windows can compromise insulation. PU foam fills these gaps, increasing energy efficiency.
- It provides sound insulation: It mechanically prevents the passage of air and sound, creating a quieter environment.
- Prevents moisture and water leakage: Gaps in exterior or interior walls can allow moisture and water to penetrate. Foam minimizes these penetrations.
- It increases the durability of the installation: In door, window, or frame installations, foam fills the gap, increasing the fastening strength.
Which surfaces can have gaps filled?
PU foam offers a wide range of applications due to its ability to adhere to many surfaces. The main surfaces that can be used to fill gaps are:
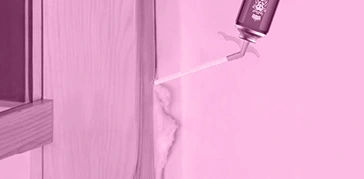
- Wood: Provides filling and fixing in door and window frames.
- Concrete and brick: Suitable for filling wall voids and cracks.
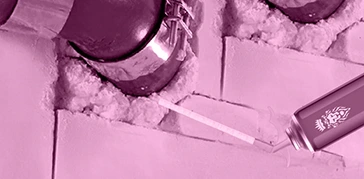
- Metal: Can be used in pipe penetrations or frames; the surface must be clean.
- Plastics and PVC: Gaps can be filled with controlled application, but complete adhesion to the surface may be limited.
Preparation Before Filling in the Blanks
Surface preparation is critical for a successful application. The following steps should be followed:
- Dust, dirt, and grease around the gap should be cleaned.
- If the surface is too damp, it should be lightly dried; if it is too dry, it can be slightly moistened.
- In deep and wide spaces, foam should be applied in layers.
- A thin applicator tip should be used for small gaps, and a wide applicator tip for larger gaps.
Step-by-Step Application Guide
1. Preparing the Tube
The foam can should be shaken well before use and prepared for the appropriate application temperature. In winter conditions, the can can be warmed slightly with lukewarm water.
2. Controlled Application
Foam should be squeezed into the gap slowly and in a controlled manner. The expansion allowance of the foam must be taken into account. Squeezing too much will lead to overflows and surface damage.
3. Layer by Layer Filling
In wide or deep voids, instead of filling all at once, it should be applied in layers. The first layer partially fills the void with slight expansion, and the second layer completes it. This method prevents flooding and provides a more solid fill.
4. Curing Time
Sufficient curing time is required for the foam to perform at its best. This time varies depending on the product type, but generally the surface hardens within 1-3 hours. Pressure should not be applied to the gaps during curing.
5. Removing Excess Material
Excess foam that spills over or adheres to the surface after expansion can be removed with a utility knife or spatula. Fresh foam can be wiped away immediately with a cloth or foam cleaner.
Fill-in-the-Blanks Tips and Tricks
- Low-expansion foam should be preferred for small spaces.
- UV and moisture resistant foam should be used for outdoor applications.
- The depth and width of the gap determine the amount of foam needed; applying too much increases the risk of overflow.
- Protective tape or plastic sheeting can be used when applying tape around pipes, electrical cables, and sensitive surfaces.
- Ensuring the surface is smooth and clean after application is important for subsequent coating or painting work.
Post-Fill Checks
After the filling is completed, some checks should be performed to assess the effectiveness of the procedure:
- Check if the space is completely filled.
- After curing is complete, test the surface for firmness by applying pressure.
- Apply a second coat or make minor adjustments if necessary.
- Remove any excess foam remaining on the surface and sand if necessary.
Conclusion
Filling voids with PU foam is one of the most effective methods for both installation and insulation. Proper surface preparation, controlled application, layered filling, and appropriate curing time ensure a long-lasting and durable filler. When applied correctly to door and window installations, wall voids, cracks, and plumbing penetrations, PU foam offers significant advantages in terms of energy savings, sound insulation, and water insulation.
The information in this text may vary from time to time depending on the manufacturer. Always check the product label.